WordPress 2.0.5 released

That's it, folks! The next version of WordPress – 2.0.5, codenamed Ronan, is finally available for download. For those of you who haven't seen the highlights of changes in this version, I strongly recommend you to have a look at a summary post by Mark Jaquith, Changes in WordPress 2.0.5

According to the announcement, this version brings fixes to 50 or so bugs, which alone is quite an effort giving the complexity of this ever-evolving blog engine.


How To Improve Your Blog Usability And Why You Want To Do It

Usability of your blog is one of the most important factors of how successful and popular it is. Yet, it is often neglected.

Read on to find reasons and motivation for improving the usability of your blog, and once you feel totally convinced, I'll show you some of the best tips to greatly improve your situation, listed along with instructions and links to respective online resources.

What is usability?

Speaking of web, usability is a term used for showing how easy (or hard) it is for your visitors to browse your online resource. Usability applies to all kinds of online resources: it can be a regular website, an electronic library or a personal blog – it doesn't really matter. What matters though is how easy it is for people to move around your collection of resources, and how comfortable you make this experience for them.

In general, usability indicates just how easy it is for people to use a particular tool in order to achieve a certain result. When you project it into the world of blogging, this makes your blog a tool. It is both a tool for you to share the information and for users to receive it. So improving your usability means making both primary uses of your blog a pleasant experience.


Why improve usability at all?

With millions of blogs updated daily, the pressure is growing every day for every one of us to raise the standards of our blogging. Demanding visitors expect increasingly more, and this means that the basic level of usability has to be maintained by every blog, including yours.

Unless you're a selfish genius who writes posts for himself, you would really want to make sure your visitors get what they expect to see when they arrive at your blog, and it's therefore absolutely vital to make them feel comfortable browsing your pages. Especially so, if you hope for some of them to come back to your blog again and again.


How To Improve Your Blog Usability

As with anything else, in order to improve your blog usability you need to find out reasons for doing so. After you understand all the reasons, you can focus on one particularly beneficial usability feature or another. Essentially, you want to define and write down the following:

  1. Your purpose for having a blog

    Why do you blog, really? What are the main goals you have? What is the purpose of your blog?

    You need to ask yourself all these questions to have eventually a list of pretty general goals of your blog, and make sure you can align your blog usability against such a list.

    Here are just a few examples of how you would align your usability improvements against your blogging goals.

    If your blogging goals are:

    • to provide visitors with useful information
    • to develop your skills and knowledge in relevant subjects
    • to gain more readership
    • to participate in blogging community

    …then your usability improvements should be respectively aimed at:

    • both increasing and simplifying ways to access information on your blog pages
    • encouraging your readers to leave comments and provide feedback
    • providing multiple means of reading your blog regularly – RSS feeds and email subscriptions
    • making sure you link to other blogs and get them to link to you
  2. Purposes your visitors might (should) have

    Why should anyone want to read your blog? What would your regular readers keep coming back for? What would a first-time visitor notice or discover first? What would your visitors be looking for?

    These questions are aimed to help you understand what kind of the first impression your blog is going to make. Imagine yourself to be a visitor to your blog. Open it up in your browser and look closely – what do you see first? Is this an important piece of information or just an accidentally highlighted design feature which bears no value?

    Again, here is a list of most obvious reasons you might have:

    • your blog contains genuinely interesting information of educational nature
    • you're an expert in your field, and visitors will come back for more information
    • your visitors are likely to be so interested that they will want to browse your previous articles
    • you are so brilliant that some people will want to read your blog regularly

    And they would mean the following directions in your usability enhancement:

    • highlighting the most recent information, notifying blog search sites about new posts
    • showing a list of most recent posts to make navigation easier
    • providing links to monthly archives of your posts and list of categories of posts
    • making RSS and email subscription options visible


Technical details 

Now that I've got you interested in usability enhancements, I offer you the following list of WordPress articles and plugins which I believe you will find useful:

  1. Blog posts archives pages
    It is very important that you give your visitors an option to access every previous post of yours with just a few clicks. Blog archives pages serve this very purpose.

    Consider using Justin Blanton's Smart Archives plugin, which will provide you with a very quick and effective way of showing your blog archives – with monthly sections and links to every individual post of each month.

    To see this in action, check out Perfect Blogger Archives page.

  2. Category lists

    Most themes for your blog would have a built-in and probably enabled by default functionality of showing a list of your categories somewhere on a sidebar.

    One of the easiest way to increase usability of such lists is to provide a total number of posts found in each of the categories. This will make it easier for your visitors to decide what category to read next, by helping them realize what categories of yours have most posts.

    To achieve this effect (you can probably notice how it looks right here on this blog), you need to use the list_cats function of WordPress:

    <?php list_cats(FALSE, '', 'name',
                            'asc', '', TRUE, FALSE,
                            TRUE, true, FALSE,
                            TRUE, FALSE, '', FALSE,
                            '', '', '',
                            TRue); ?>

  3. Tag cloud
    This is a brilliant way to improve usability of your blog. Effectively, you will allow visitors to pick only specific topics of their interest as oppose to limiting them by your own list of categories.

    Tags are more specific than categories by their nature, so don't be surprised to end up with a long list of tags in your tag cloud.

    The idea of tag cloud is that it's going to highlight (using different font sizes) the most popular tags of yours (the once set for most number of posts), once again highlighting the most talked about topics of yours. The working example is found on this very site on the left sidebar.

    Ultimate Tag Warrior is the best plugin for this purpose. It's rather complicated, but well worth the time it requires to be properly setup.

    If you prefer doing everything yourself, you might like this Building A Tag Cloud in WordPress article.

  4. Blog feeds
    When people like your blog, they usually want to read it regularly. And since the easiest way to do this is by receiving your blog feeds, there is definitely something you can do to make their life easier.First of all, make your feed button (or text link) visible.

    Don't expect people open up a separate window with HTML code of your blog to find the feed link manually (although that's exactly what I do for far too many blogs simply because it's impossible to find their feed button on the page). Most people won't be like me, they will just wonder where your feed subscription might be, decide to come back to your blog, and eventually forget to do it.

    A bright visible feed button is the least you can do for your future readers.

    Another usability improvement here is to install a Feedburner Feed Replacement plugin and get all the various formats of feeds (RSS is only one of them) redirected to your one and only public feed, which you need to configure at FeedBurner.

    Setting your FeedBurner account is easy enough, and having a single blog feed will make your life easier in many ways: not only will FeedBurner automatically show the feed in expected by a client program format (for instance, your feed aggregator might expect your feed in Atom, RSS or RSS 2.0 format, or it could be just a regular browser opening the feed URL – FeedBurner will show a nice looking page with your posts in this case), and most importantly it will allow you to effortlessly track your readership.

    Open this page in your browser to see my FeedBurner feed in HTML: PerfectBlogger.

  5. Comments on your blog

    There is a whole array of various plugins to make your comments management and representation better for you and your readers.

    I suggest you explore the Comments Plugins section on the WordPress development site.

    You can also benefit from reading the Editing your blog comments article by Lorelle on WordPress.

  6. Related posts

    This is another great way of improving usability of your blog.
    By interlinking (providing links to relevant posts of your own blog), you will make visitors stay longer on your blog. You will also help them explore more on the topic of their interest.

    I prefer specifying relevant topics myself, and for this purpose I suggest you use a Terong Related Posts plugin. It simply adds a link to your post editing window in WordPress, and allows you to select the relevant posts from a global list of all the posts. Selected posts will then be given as a neat list of links at the bottom of your post.

    If you would like relevant posts to be identified automatically, you should have a look at a Related Entries plugin by W.A.S.A.B.I. then.


External links

You should find these resources interesting and relevant to this article:

Challenges of Your Blog Comments

I just have to share this link with you! Lorelle VanFossen from the Lorelle on WordPress blog has just posted a great article on editing your blog comments.

The important lesson you can learn from this article is that comments on your blog, even left by visitors, are still associated with your blog. It is therefore in your own interest to make sure these comments look their best and bring the clear message across to other visitors and readers of yours. 

Lorelle seems to have covered every reason you may want to edit a comment for, and she also has thoughtfully given you tips on how to deal with certain situations like moving a comment to a new location in the most elegant way.

Truly, an excellent article I suggest you all read: Editing Your Blog Comments.

Google AdSense: How To Show Search Results On Your Own Page

While opening Google AdSense search results  within your own site is definitely not new, I haven't seen any quick review explaining how it all works and what's required to set it up. Working on enabling this AdSense feature for my Personal Development blog, I figured someone else could find this post useful.


Introduction

Why would you want to show Google search results on your own page? To make sure your visitors enjoy the same interface the rest of your website has, of course. To ensure the design integration makes visitors feel as if they're browsing just another one of your pages.

Everyone who had used Google AdSense for search feature in the past, must remember that you had only an option to change some basic colors for the results block, and it would be opened from Google's website and usually look very different from the rest of your website.

Well, now we have an option to change this.


How it works 

The idea behind showing your Google search results on your own site is pretty simple. You've got to set up a designated search results page on your site. You're free to change any design feature of this page to make sure it looks as good as any other page of your website, but space for the Google search results must be reserved.

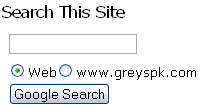
Instead of one piece of Google AdSense code, you're going to get two. The first piece of code is the one creating a Google search form for your website. Something which will look like this:


Google AdSense search form


The second piece of code is for your results page. Just copy & paste the search results code from your Google Adsense to your search results page,  and you're done. If you open such a page manually, without being called by Google AdSense search form, you will see no search results, but if the page is shown as the result of an actual search using the Google search form on your website, you will see a neat page with all the results found and nicely integrated in your design.


Step-by-step instructions

I don't intend this page to be a full manual on the Google AdSense search results integration by any means, but all the steps shown before will hopefully show you how easy the whole procedure is. 


1) Google AdSense account – you must have a valid AdSense account to begin with. If you still haven't got one, it's not too late to get one – you will find all the details in my Getting Started with Google AdSense article.


2) Find out the URL of your future results page 

You need to know where you results page is going to be found, because you will be asked for this URL in during AdSense for search setup.

For WordPress-based blog, it is fairly simple to specify the exact name of your page and therefore know the full URL for this page without even creating it (you can't created it yet, read on to find out why)


3) AdSense for search setup 

Log into your AdSense account, open the AdSense Setup tab,  click the AdSense for search, and configure your Google AdSense search in a way similar to this:

  • Search Type section – this is where you decide what kind of search you would like to provide your visitors with. Most likely, you will opt for a Google WebSearch + SiteSearch, as it allows both global and local (your domain-specific) searches.

    Click the radio button for the desired option, and if you opted for the SiteSearch option, type your website's URL in the form provided.

  • Search box style section – this dialog allows you configure the way your Google search form will look on your website
  • More options section is the one where you need to choose the preferred way of  Opening of search results page. If you click the  Open results within my own site radio button there, you will be prompted for a URL of your search results page from Step 2 of this how-to.

Complete all the rest options like you normally would, and the last step of your AdSense for search setup will be the two pieces of code I have mentioned before, ready for you to copy and paste into your website pages. 


4) Create a designated search results page for your website

Now that you have the necessary pieces of code in your AdSense setup window, would be a good time to create the results page of yours.

If you're a blogger, then you need to create a static page of some kind and make it look the same way you'd like it to be, leaving space to be populated with search results. 

If your blog is WordPress-based, you will need to create a page template, and then create a new page based on this template. You can find all the necessary information on working with Pages in WordPress on the Pages section of official WordPress documentation site. 

Essentially, a page template in WordPress is nothing but an PHP/HTML file you create in your WordPress theme directory. Take one of the existing page templates to start off, and make sure you paste the second piece of AdSense search code  into this page template where you would like to see your search results.


5) Update your website to include the latest AdSense code for the search form. This is where you decide what page of your website (or pages if it's your blog – cause many bloggers put search forms in the sidebar code, so that the search form is shown on practically every page of their blog.


That's all, you're done. Enjoy your new Google AdSense search results page!

If you're looking for a working example, please visit my Personal Development blog, and use the search form found on the right  sidebar. If you want to compare my search results page to the same page opened manually, you can always open the search results page yourself (like I mentioned before, you will obviously see no results in this case).

Let me know if you need help with getting this AdSense feature working on your website – just a leave a comment for this post, and I'll be sure to contact you using the email provided.

Also, I think you would benefit from reading the official AdSense support article on the same topic: How do I implement Adsense for search results on my own page?
 

Archives page added

I've just added a PerfectBlogger Archives page, where you'll be able to find every post I've made on this blog.


Archives page is one of the basic pages each blog should have. Not only does it help your visitors navigate around your older posts, but it also servers SEO purposes: it helps search engines get to each of your pages with content the quickest way.

If your WordPress theme doesn't come with a built-in archives feature, or if you don't like it for some reason, I strongly suggest you download and install the SmartArchives plugin by Justin Blanton

WordPress Tutorials by cre8d design

Rachel Cunliffe in her cre8d design blog just posted a wonderful WordPress Quick Screencast Tutorial, Part 1


Part One is a half-an-hour video tutorial showing you how to set up a brand new blog of yours. It covers such topics as downloading the freeware FTP software and using it to upload your WordPress blogging engine to your hosting provider. The tutorial also explains what posts and categories are, and shows you how to quickly create the very first post of yours. There is also quite a number of quick tips on getting started with your WordPress blog.

Well done, Rachel! It's always much better to show how to do something, and I think this 30min video covers what could possibly take pages and pages of online tutorials.


For any of you just thinking of setting a new blog up – this is one video you must watch!

The second part of the tutorial is expected soon, so I'll probably just update this post when it's available for you to download.

WYSI-WordPress

Last few really big posts on my Personal Development blog were an absolute struggle to publish. The built-in WYSIWYG editor WordPress 2.0+ is a nightmare to work with. While it handles simple texts more or less correctly, it’s helpless when it comes to anything as complex as a post with some numbered lists or lots of paragraphs with different font styles.

I must have edited and reviewed one of my posts at least 50 times before I gave up. I’ve started looking for an alternative plugin to replace this editor, and voila – I’ve found the WYSI-Wordpress!

WYSI-Wordpress is an incredibly useful plugin whch works correctly in both IE and Mozilla-based browsers. There are versions for both WP 1.5 and WP 2.0+ branches, and – most importantly of all! – this plugin actually IS WYSIWYG. So practically everything you see in your edit window is going to look the same in the preview area. I’m telling you, it’s been quite a relief for me to finally finish the formatting and enjoy seeing the entry text exactly the way I pictured it in my mind!

So if you’re sick of the built-in editor, disable it right away and try out the WYSI-Wordpress! You will never regret!

8 Best WordPress Plugins

If you're serious about blogging with WordPress, you will definitely like the 8 Invaluable WordPress Plugins article on PingMag website.

I've started using WordPress just a few months ago (before it was another blog engine – Serendipity), so I have personally used only a few of the plugins listed, and I haven't even heard about some others. Still, the 3 plugins I use already I can highly recommend:

ProBlogger: A Very Useful Blog

The more time I spend reading Darren Rowse's ProBlogger blog, the more I realize there's so much learning to be done!

I like ProBlogger a lot. It's one of these resources you know you'll find something useful on, so I sometimes just start reading through a series or a category of posts, and it's incredible how much stuff I've been thinking or worrying about is already explained and covered on ProBlogger's pages!

I can hardly find a blogging-related topic which isn't covered there (although this probably means I'm very new to the blogging and simply have tons of stuff to learn): general blogging tips, SEO, WordPress customization, AdSense – you name it! It's like a book (hey, that's an idea! It'll be a bestseller for sure!).

For some blogs, you enjoy the reading so much that you feel almost scared as you dig deeper and deeper into archives, because you know that someday you're going to reach the bottom of the posts archive, and that will the end. But with Darren's resource it's much better – not only it is a very comprehensive guide, but it's also a very dynamic one, so there is lots of useful and relevant information added daily.

I think I'm a fan of ProBlogger. After all, it is such a pleasure to learn from someone who grew knowledgeable in the field simply by trying all the steps you've already taken plus hunders more which you're only planning to take.